

To me it resembles a gorgeous trim:

It even makes a pretty stitch when seen from the underside:

This is the latest stitch I have "learned" from 100 Stitches. I said may or may not be the stitch because I really couldn't figure out the way to do this stitch from the written instructions or the two diagrams provided in 100 Stitches. I also couldn't find any help on the web, so I just tried what I thought would be the way to get this result and that is what I will demonstrate.

Before I start, you might enjoy this picture :) This hoop full of disaster shows some of my first attemps at this stitch:

This is a stitch that is easier if you have some guidelines. I drew two parallel lines, 1/8" apart.

The stitch (just like the name implies) is a series of buttonhole stitches with a picot added at regular intervals. Start the stitch just as if you were making a line of buttonhole stitches. Working left to right, come up through the fabric on the left edge of the bottom guideline:

Pull all the way through. Bring your needle around and go back into the fabric on the top guideline and back out of the fabric on the bottom guideline. Notice the needle tip is going to go over the working floss:

Pull all the way through and you have your first buttonhole stitch:

Now bring the needle around and do the next buttonhole stitch:

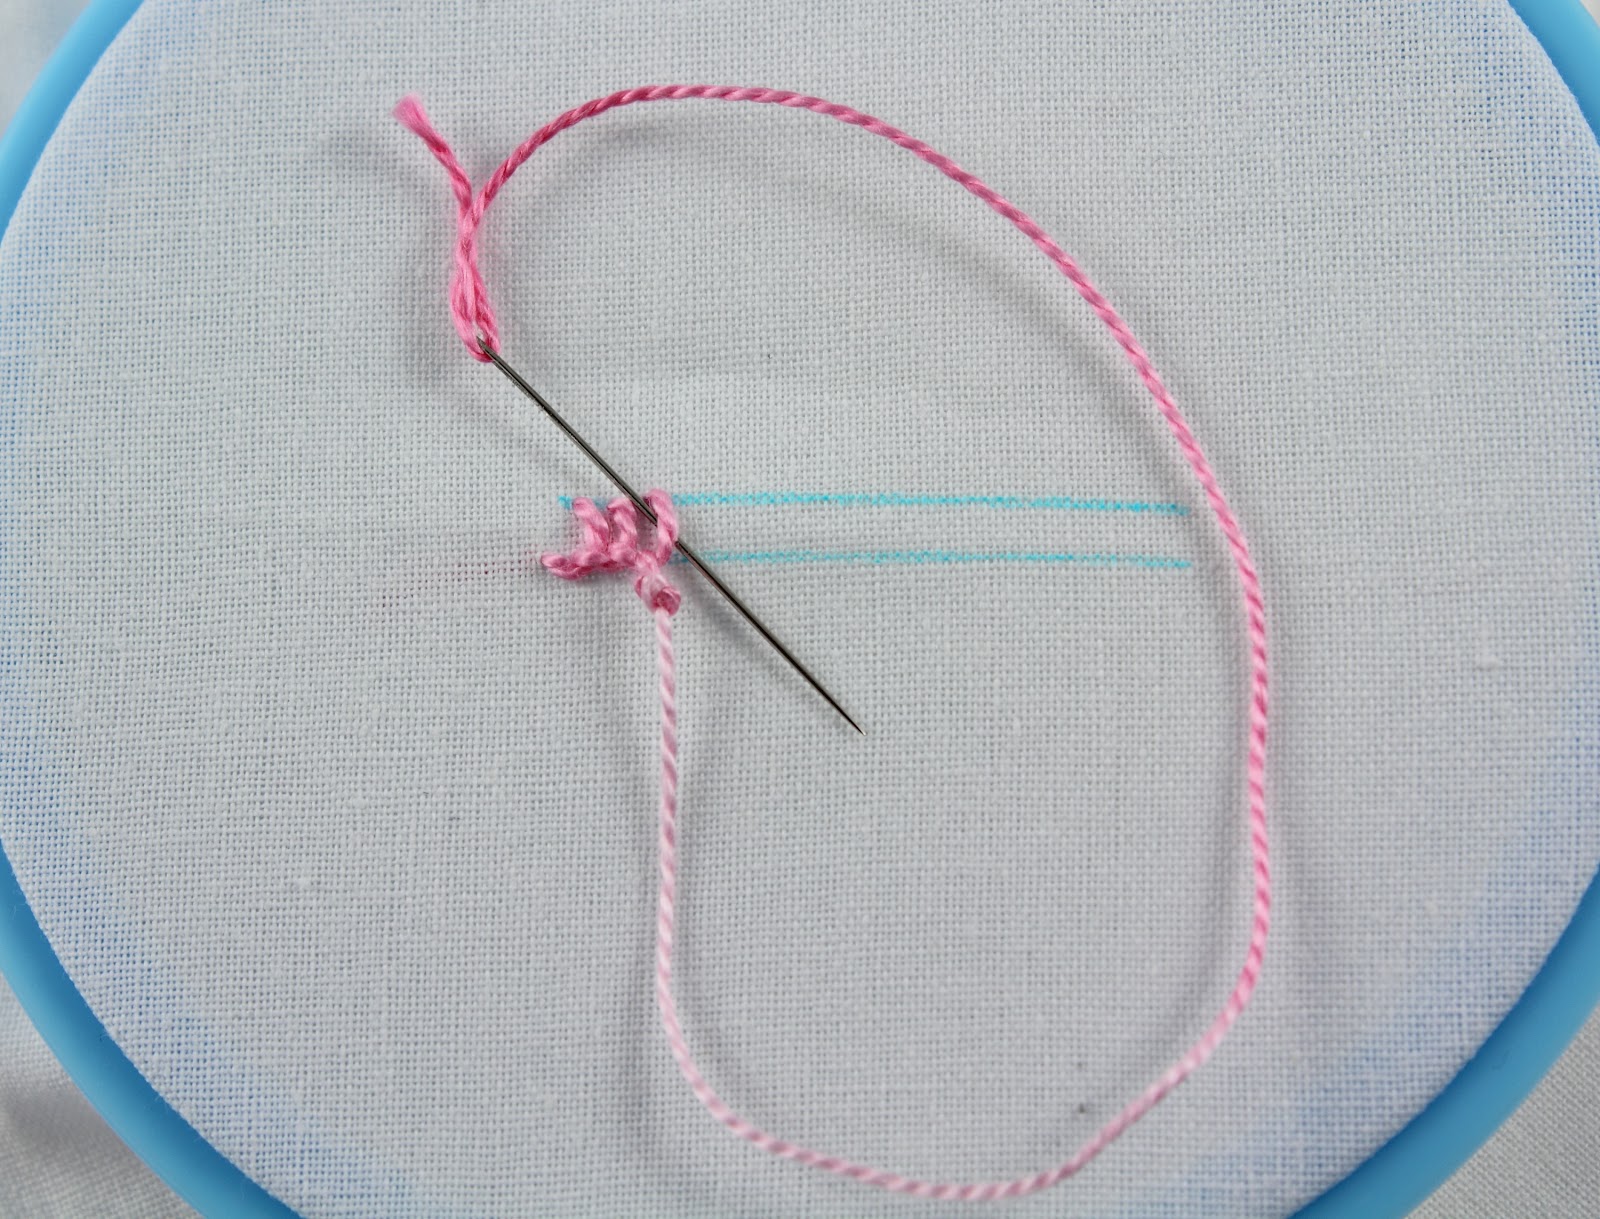
When you have 3 buttonhole stitches, you are ready for the first picot.

Slide the needle under the working floss:

and wrap the working floss around the needle three times:

Carefully work the three loops up close to the edge of the buttonhole stitches while you carefully pull the needle all the way through:

This should result in a long knot or picot:

Now bring your needle around and under the last buttonhole stitch and over the working floss. Don't go into the fabric. Pull all the way through and it makes a buttonhole stitch:
Now bring your needle around and you are ready to start the next buttonhole stitch:
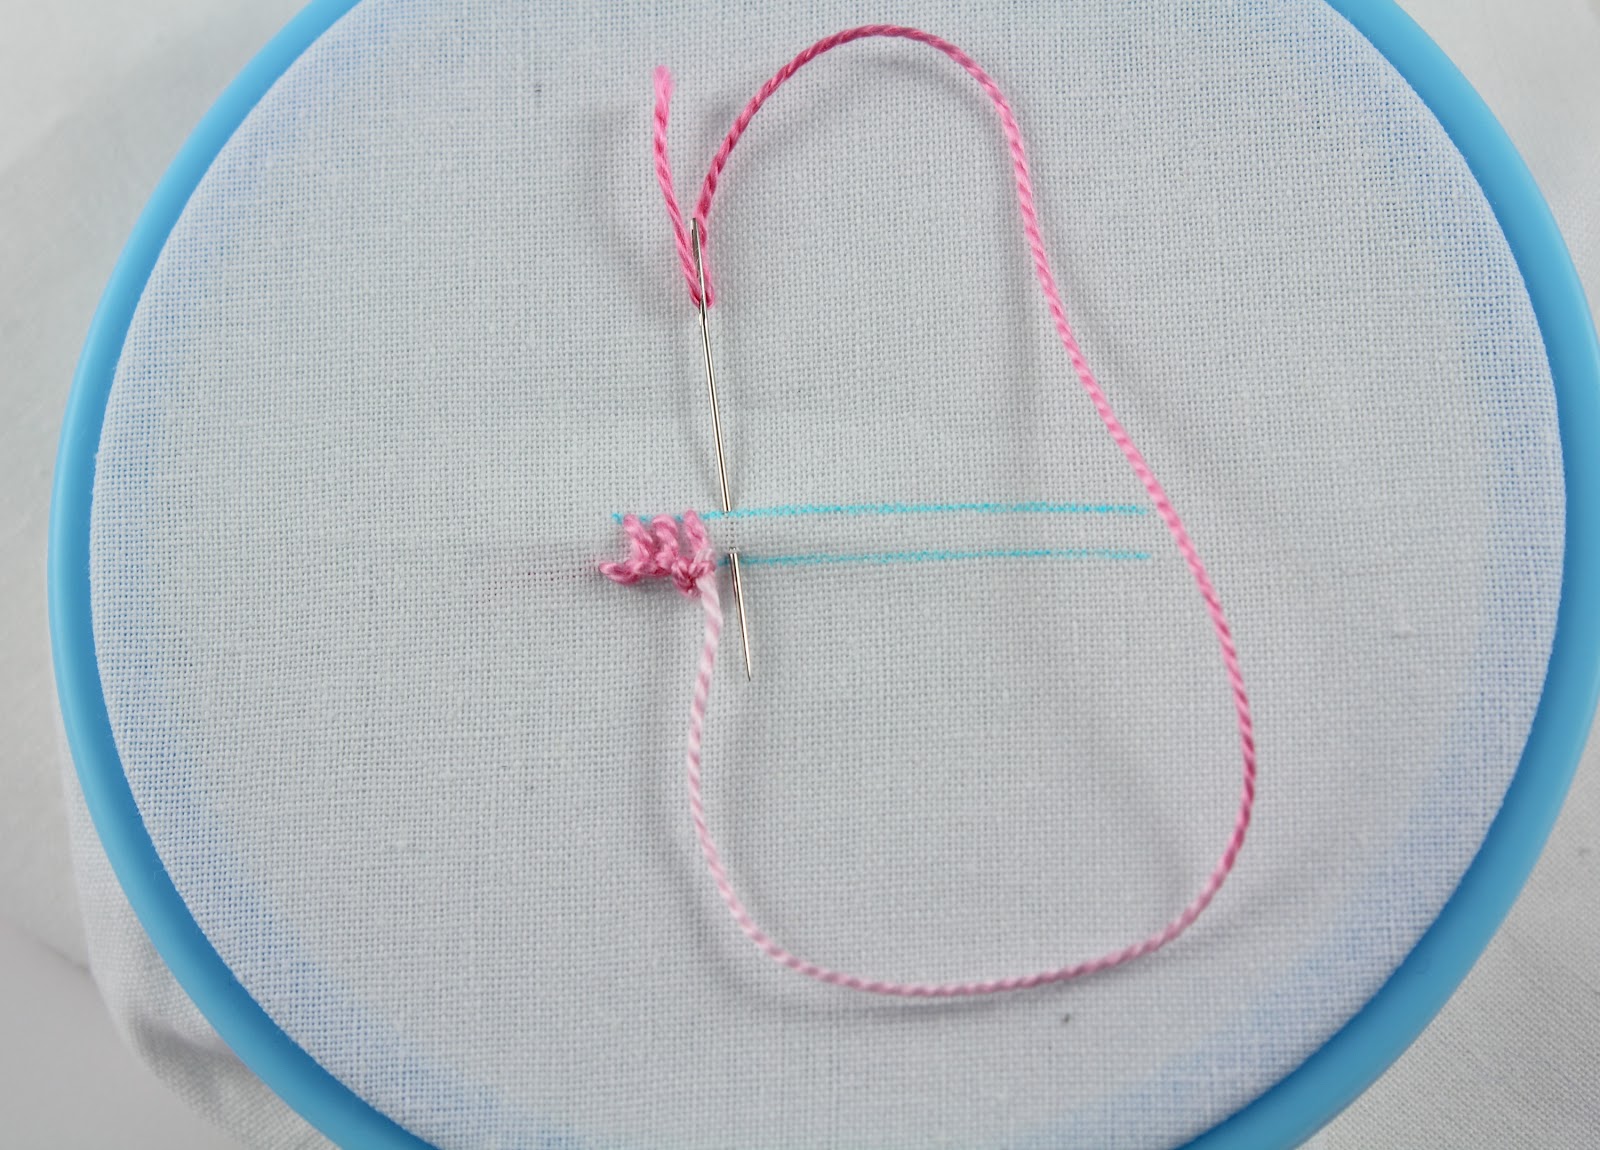
Just continue until you have a full line of stitching.
The difficulty I had was in the forming of the picot. I would really like to know if this is the correct way to do this. Have you ever heard of this stitch or seen a demonstration? I would appreciate any tips or corrections!
This stitch is #27 and is in the Looped Stitches section of 100 Stitches. The floss I used is the beautiful DMC Color Variations #4180.


23 comments:
It makes such a pretty trim. I want to try it out. Thanks for the instructions! I love the DMC colour variations also.
:) Thank you Wenda! I love this floss too.
I like this one. Especially in pink!
very right Kim... A very good trim... thanks for the tutorial...
http://craftaworld.blogspot.com/
With love
Farah
Thank you Miss Paula!
Farah - Thanks!
what a lovely stitch, I thought at first that it was a piece of crochet! Lovely threads you're using too
Kate x
wonderful stitch. thank you much for the how-to's!!! blest be ;)
Thank you Kate :) It does look a lot like crochet!
Hi donna!ee - Thank you - these are fun to show but I wish I had a better grasp on how to do this one!
Call it what you like - I lurves it! Crochet always stumps me when I try to teach myself, but I think I could get the hang of this for trim.
Right or wrong, it's a pretty stitch. I can't see anything wrong. The only thing I could see that would possbily be different is the thread wrapping. I wrap the opposite way, (according to picture you're wrapping clockwise, I wrap counter-clockwise) But in the end I think it should turn out the same, no matter which way you wrap???
Hi Ellen - I am stumped by crochet too - I am glad I can (sort of) do this stitch instead - and I like the shimmery, glossy look that floss gives!
Cyndi - Thanks! I'm happy that this looks right - I wondered about the wrap direction too. I decided to do it exactly like the diagram in 100 Stitches but I think a little experimenting might be in order!
Thanks for all the tutorıals. with love...
Hello Ozlem - Thank you! I enjoy learning these new stitches :)
Kim, I love it. I found one on Mary Corbett's site (no instructions though) and it looks almost exactly like hers. This would make a wonderful trim on one of my collars! Thanks for the idea. The only picot I know how to do is in tatting. I wonder if the two could be combined....It might be worth experimentation.
Thank you Angela - This would be beautiful on collars - you should try it, I would love to hear what you think about doing this stitch. Tatting hmmm...I wonder if it would be much different?
Not to me really. A picot in tatting is actually a loop formed when you leave a space between the wraps that would hang from the knot. I'll send you a pic if I try it.
Angela - Ah that makes sense :) Looking forward to your pic if you try it!
Gosh this is a beautiful little stitch. And you make it looks so easy! :)
Thank you Denise :)
Thanks for all the tutorıals..
Hi Jin Young Jo - You are welcome! I love learning these stitches and they are fun to share :)
As someone who is just learning to stitch I appreciate that you posted a picture showing your learning process. Sometimes when I am looking at other people's work I forget that they, too, sometimes had problems or less than ideal results. Thank you so much.
I love your stitching.
Thank you! It is wonderful that you are learning to stitch, embroidery is such a fun hobby. I really like to post about my learning process, this particular stitch was really a toughie!
Post a Comment